Running DEIS.IO on Rackspace Cloud
February 23, 2014
I recently did a presentation at the Cloud Austin meetup titled Docking with Unicorns about new PAAS on the block DEIS. Building out DEIS is quite easy, make more easy by some tight integration they have with Rackspace Cloud. If you’re interested in what deis is go through my slides linked above, and the documentation on their website. If you want to build out an environment to kick the tires a bit, then click ‘Read on’ below and follow me down the rabbit hole.
Chef setup
Chef offers a free hosted service for up to five servers. That’s plenty for this exercise so go to the registration page and create yourself a user. At some point it will prompt you to generate and save a key, do that and download it.
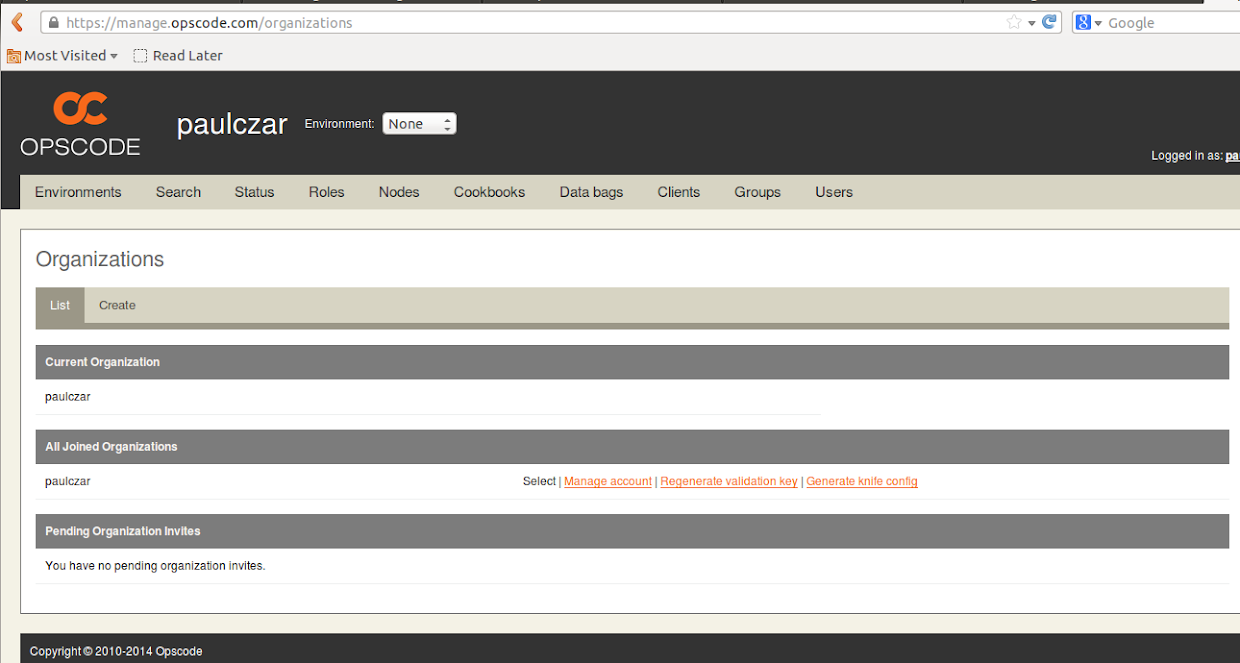
Once you have signed up you can download a knife config file and generate a validation key from the Organizations page. We can save those down and then move them to a local working directory.
Prepare Working Environment
Create a ~/paas working directory and configure your local chef tools like this ( change the Download location to match the files you downloaded above ) :
$ mkdir -p ~/paas/.chef
$ cd ~/paas
$ mv ~/Downloads/<username>.pem .chef/
$ mv ~/Downloads/knife.rb .chef/
$ mv ~/Downloads/<username>-validator.pem .chef/
Clone the Deis Repository
Clone the deis project into your paas working directory:
$ cd ~/paas
$ git clone https://github.com/opdemand/deis.git
Cloning into 'deis'...
remote: Reusing existing pack: 5651, done.
Receiving objects: 100% (5651/5651), 2.16 MiB | 1.37 MiB/s, done.
remote: Total 5651 (delta 0), reused 0 (delta 0)
Resolving deltas: 100% (3131/3131), done.
Checking connectivity... done
Install Pre-reqs
Assuming you have a working Ruby 1.9.3+ and the bundler gem installed you should be able to use the Gemfile from the deis project to ensure you have all the necessary tools:
$ cd ~/paas/deis
$ bundle install
bundle install
Fetching gem metadata from https://rubygems.org/.......
Fetching additional metadata from https://rubygems.org/..
Using i18n (0.6.9)
Using multi_json (1.8.4)
Using activesupport (3.2.16)
Using addressable (2.3.5)
...
Using bundler (1.5.2)
Your bundle is complete!
Use `bundle show [gemname]` to see where a bundled gem is installed.
I had some errors installing the eventmachine gem and had to follow this fix to get bundle install to work
Test Chef Connectivity
To make sure we configured chef correctly and installed knife as part of the bundle we can run a quick knife command:
$ bundle exec knife client list
<USERNAME>-validator
Create an Environment for Deis
Deis is currently hardcoded to use the _default chef environment. There is a current issue on their github to resolve this. Once that is done I’ll update these instructions to create a deis environment.
Upload the Deis Cookbooks
If that went well we can upload our cookbooks:
cd ~/paas/deis
$ bundle exec berks install
Installing apt (2.3.8) from site: 'http://cookbooks.opscode.com/api/v1/cookbooks'
Installing docker (0.31.0) from site: 'http://cookbooks.opscode.com/api/v1/cookbooks'
Installing rsyslog (1.10.2) from site: 'http://cookbooks.opscode.com/api/v1/cookbooks'
Installing sudo (2.3.0) from site: 'http://cookbooks.opscode.com/api/v1/cookbooks'
...
$ bundle exec berks upload
Using apt (2.3.8)
Using docker (0.31.0)
Using rsyslog (1.10.2)
Using sudo (2.3.0)
Installing deis (0.5.1) from git: 'https://github.com/opdemand/deis-cookbook.git' with branch: 'master' at ref: '6361706a1d3245d2a061ed55f5dd4b7cb60d5e5c'
Using git (2.7.0)
...
Create Deis Databags
Deis uses some databags to help manage application state. We can create them like this:
$ bundle exec knife data bag create deis-formations
Created data_bag[deis-formations]
$ bundle exec knife data bag create deis-apps
Created data_bag[deis-apps]
Prepare Infrastructure
I’m using Rackspace cloud servers for this as I have the (http://developer.rackspace.com/blog/developer-love-welcome-to-the-rackspace-cloud-developer-discount.html)[Rackspace Developer Discount] which is enough discount to host this for free.
Since Deis will want your rackspace credentials to configure worker nodes I recomment creating a user under (https://mycloud.rackspace.com/account#users/create)[User Management] in your account to use for this.
Create a Cloud Load Balancer
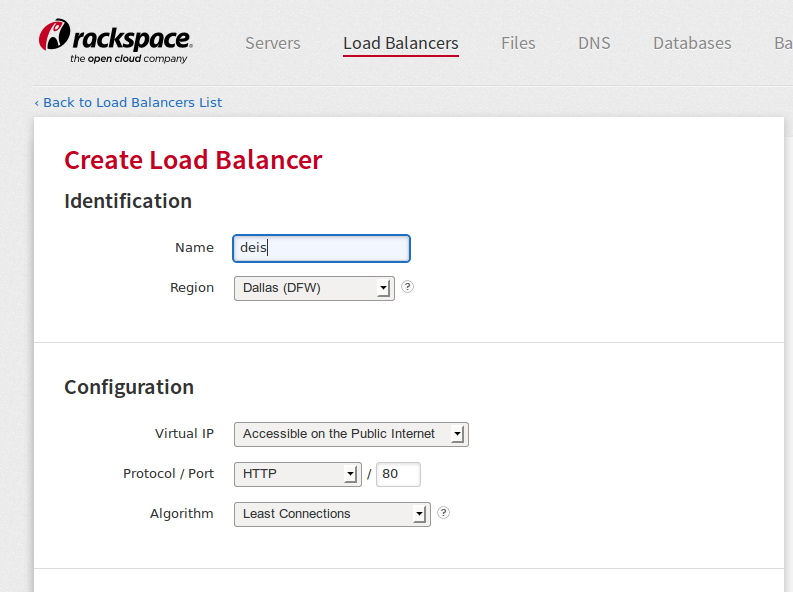
Log into mycloud.rackspace.com and click on the (https://mycloud.rackspace.com/load_balancers)[Load Balancers] button. Select the Dallas Region (DFW) and hit Create Load Balancer.
- Set the Name to
deisand check the region is set toDallas (DFW)and hitCreate Load Balancer
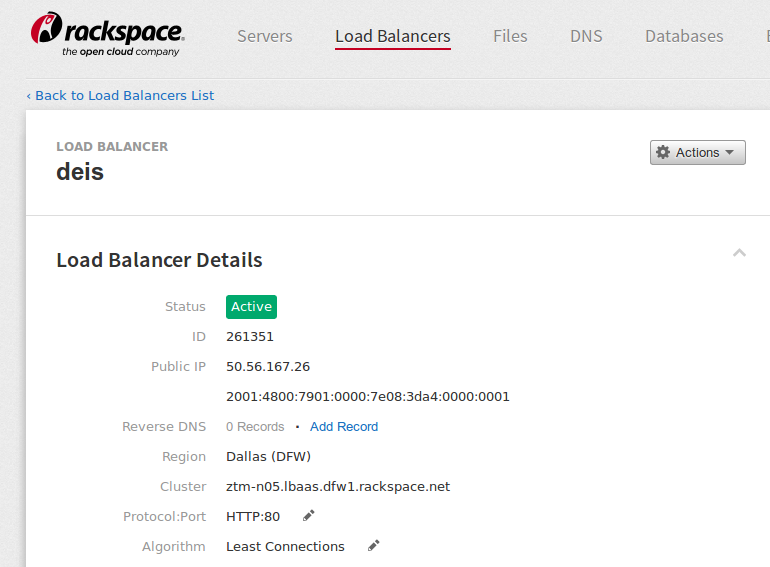
- Take note of the public IP of the Load Balancer, we’ll need it later.
Wildcard DNS
Deis’ proxy layer requires you to set up Wildcard DNS to point to your proxy layer. There are many ways to achieve this here are two options:
-
Rackspace Cloud DNS can host wildcard DNS entries, if you already have DNS hosted by rackspace using Cloud DNS simply add an A record for
*.deisunder your domain and point it to the IP of your load balancer. -
The (http://xip.io)[xip.io] domain does wildcard DNS based on your IP. We can use this with our Cloud Load Balancer to load balance our applications. My Load Balancer has a public IP of
50.56.167.26therefore my wildcard domain will be50.56.167.26.xip.io. Remember this.
Configure Knife for Rackspace
The bundle install above already installed the rackspace knife plugin so we just need to add some details to .chef/knife.rb.
$ cat <<'EOF' >> $HOME/.chef/knife.rb
knife[:rackspace_api_username] = "#{ENV['OS_USERNAME']}"
knife[:rackspace_api_key]      = "#{ENV['OS_PASSWORD']}"
knife[:rackspace_version]      = 'v2'
knife[:rackspace_region]       = :dfw
EOF
Install Rackspace Nova Client
We also need the Nova client:
$ sudo pip install rackspace-novaclient
$ cat <<'EOF' >> ~/paas/.chef/openrc
export OS_AUTH_URL=https://identity.api.rackspacecloud.com/v2.0/
export OS_AUTH_SYSTEM=rackspace
export OS_REGION_NAME=DFW
export OS_USERNAME=<RACKSPACE_USERNAME>
export NOVA_RAX_AUTH=1
export OS_PASSWORD=<RACKSPACE_API_KEY>
export OS_NO_CACHE=1
export OS_TENANT_NAME=<RACKSPACE_USERNAME>
EOF
$ source ~/paas/.chef/openrc
Test Rackspace Connectivity
Make sure you can connect to Rackspace with Knife:
$ bundle exec knife rackspace server list
Instance ID  Name  Public IP  Private IP  Flavor  Image  State
Make sure you can connect to Rackspace with nova:
$ nova list
+--------------------------------------+-----------------+--------+------------+-------------+----------------------------------------------------------------------------------------+
| ID                                   | Name            | Status | Task State | Power State | Networks                                                                               |
+--------------------------------------+-----------------+--------+------------+-------------+----------------------------------------------------------------------------------------+
Build base images for Controller and Nodes.
This isn’t strictly necessary, but will help build your nodes quicker on subsequent builds.
Launce a new instance:
If we create a base image and pre-install some software we’ll get a faster booting system for auto-provisioning:
$ bundle exec knife rackspace server create \
  --image '80fbcb55-b206-41f9-9bc2-2dd7aac6c061' \
  --node-name 'deis-base-image' \
  --flavor 'performance1-1'
...
...
Instance ID: 56760bf1-b977-405e-9348-f70b15a14b87
Host ID: 97da00a12312a7e455bda70c6dfab8833953e2a03b081aeedfd68152
Name: deis-base-image
Flavor: 1 GB Performance
Image: Ubuntu 12.04
Metadata: []
Public DNS Name: 23-253-69-98.xip.io
Public IP Address: 23.253.69.98
Private IP Address: 10.208.101.31
Password: **************
Take note of the Instance ID, Public IP Address and Password. We’ll need them later.
Add users / keys to instance
We’re going to add our ssh key as well as a local deis-ops user to the image to make it easier to manage and troubleshoot later:
$ DEIS_IP=<IP_OF_SERVER>
$ ssh-copy-id root@$DEIS_IP
root@162.242.144.193's password:
Number of key(s) added: 1
Now try logging into the machine, with:   "ssh 'root@162.242.144.193'"
and check to make sure that only the key(s) you wanted were added.
$ ssh root@$DEIS_IP
Welcome to Ubuntu 12.04.3 LTS (GNU/Linux 3.2.0-55-virtual x86_64)

 * Documentation:  https://help.ubuntu.com/

  System information as of Sun Feb 23 18:34:40 UTC 2014

  System load:  0.08              Processes:           60
  Usage of /:   5.5% of 19.68GB   Users logged in:     0
  Memory usage: 6%                IP address for eth0: 162.242.144.193
  Swap usage:   0%                IP address for eth1: 10.208.135.114

  Graph this data and manage this system at https://landscape.canonical.com/

Last login: Sun Feb 23 18:33:02 2014 from cpe-24-27-47-27.austin.res.rr.com
root@deis-base-image:~# useradd --comment 'deis ops user' --home-dir '/home/deis-ops' \
  --shell '/bin/bash' --create-home deis-ops
root@deis-base-image:~# mkdir -p /home/deis-ops/.ssh && \
   cp /root/.ssh/authorized_keys /home/deis-ops/.ssh/authorized_keys && \
  chown -R deis-ops:deis-ops /home/deis-ops && \
  chmod 0700 /home/deis-ops/.ssh && \
  chmod 0600 /home/deis-ops/.ssh/authorized_keys && \
  echo 'deis-ops ALL=(ALL) NOPASSWD:ALL' > /etc/sudoers.d/deis-ops && \
  chmod 0440 /etc/sudoers.d/deis-ops
root@deis-base-image:~# exit
Check that you can log in with these new creds:
$ ssh deis-ops@$DEIS_IP
deis$ sudo bash
root@deis$ exit
deis$ exit
Finish preparing node image
Next we’re going to update the kernel and prepare the base node image.
$ ssh deis-ops@$DEIS_IP 'sudo apt-get update'
$ scp contrib/rackspace/*.sh deis-ops@$DEIS_IP:~/
$ ssh deis-ops@$DEIS_IP 'sudo ~/prepare-node-image.sh'
$ ssh deis-ops@$DEIS_IP 'sudo apt-get install -yq linux-image-generic-lts-raring linux-headers-generic-lts-raring'
Create an image from this server
$ nova image-create deis-base-image deis-node-image
After a few minutes you should see this response to running nova image-list, if you’re impatient like me wrap your command with a watch:
$ watch 'nova image-list | grep deis'
| df958d26-6515-4dd9-a449-920e74ea93a2 | deis-base-image                                              | ACTIVE | 0fc7f68b-176d-49a9-82ff-2d5893d32acd |
Once the image is active we can move onto the next steps.
Prepare controller image
Next we want to prepare the VM for the controller image:
$ ssh deis-ops@$DEIS_IP 'sudo ~/prepare-controller-image.sh'
$ ssh deis-ops@$DEIS_IP 'sudo apt-get install -yq linux-image-generic-lts-raring linux-headers-generic-lts-raring'
Create an image from this server
$ nova image-create deis-base-image deis-base-image
After a few minutes you should see this response to running nova image-list, if you’re impatient like me wrap your command with a watch:
$ watch 'nova image-list | grep deis-node'
| f2236fa6-1e2d-4746-ac87-a3dd6b2de811 | deis-node-image                                              | ACTIVE | 633d5d88-54b3-463c-80fe-c119f4eb33a3 |
Delete the instance
No need to keep the instance around and keep paying for it once you have the image:
$ bundle exec knife rackspace server list | grep deis
42899699-68e7-4785-9f49-e0050f86249a  deis-base-image  162.242.144.193  10.208.135.114  performance1-1  80fbcb55-b206-41f9-9bc2-2dd7aac6c061  active
$ bundle exec knife rackspace server delete 42899699-68e7-4785-9f49-e0050f86249a --purge
Create the Deis Controller server
Launch the Server
Launch the server from the image you created earlier:
$ nova image-list | grep  deis-base-image
| a58c9895-6349-442a-bba7-99611900209d | deis-base-image
$ knife rackspace server create \
  --image a58c9895-6349-442a-bba7-99611900209d \
  --rackspace-metadata "{\"Name\": \"deis-controller\"}" \
  --rackspace-disk-config MANUAL \
  --server-name deis-controller \
  --node-name deis-controller \
  --flavor 'performance1-2'
Instance ID: bb713170-9322-424a-8837-863a4b396705
Name: deis-controller
Flavor: 2 GB Performance
Image: deis-base-image
...
Public IP Address: 23.253.104.13
Private IP Address: 10.208.132.190
Password: CQwDU4m97nvF
Take note of the Instance ID and Public IP Address.
If you have an easy to manage domain add an A record for deis to it for the Public IP address. If not
add an entry to your hosts file ( or do both! I did ):
$ sudo sh -c "echo '<IP_OF_SERVER> deis' >> /etc/hosts"
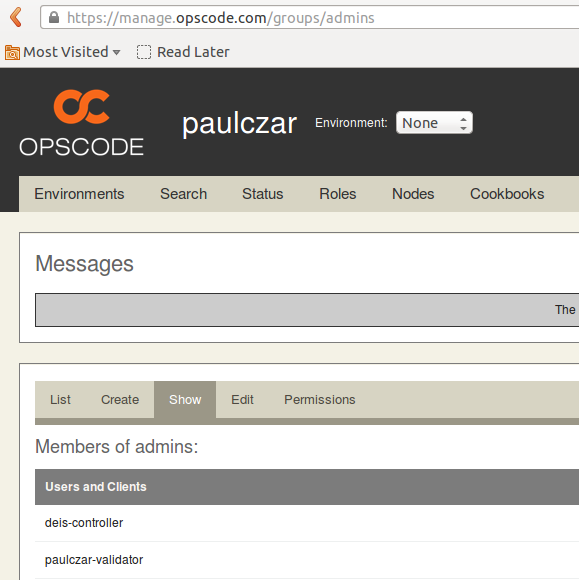
Modify Chef Admin Group
On the Chef management website click (https://manage.opscode.com/groups/admins/edit)[Groups] and add the deis-controller client and your validator client to the admins group.
Converge the Deis Controller Server
Edit the deis-controller node via this command:
$ EDITOR=vi knife node edit deis-controller
make it look like this:
{
  "name": "deis-controller",
  "chef_environment": "_default",
  "normal": {
    "tags": [

    ]
  },
  "run_list": [
    "recipe[deis::controller]"
  ]
}
then converge the node by running chef client on it:
$ ssh deis-ops@deis sudo chef-client
[2014-02-23T19:25:32+00:00] INFO: Forking chef instance to converge...
[2014-02-23T19:25:32+00:00] INFO: *** Chef 11.6.2 ***
[2014-02-23T19:25:33+00:00] INFO: Run List is [recipe[deis::controller]]
[2014-02-23T19:25:33+00:00] INFO: Run List expands to [deis::controller]
[2014-02-23T19:25:33+00:00] INFO: Starting Chef Run for deis-controller
[2014-02-23T19:25:33+00:00] INFO: Running start handlers
[2014-02-23T19:25:33+00:00] INFO: Start handlers complete.
...
$
Testing Deis
Install the Deis Client with pip
The Deis client is written in python and can be installed by pip:
$ sudo pip install deis
Register Admin User
First user to register becomes the Admin:
$ deis register http://deis:8000
username: admin
password:
password (confirm):
email: admin@example.com
Registered admin
Logged in as admin
Push your public key to deis:
$ deis keys:add ~/.ssh/id_rsa.pub
Uploading SSH_KEY to Deis...done
check the web server is serving content by browsing to (http://deis)[http://deis] and entering your admin credentials.
Teach Deis your provider credentials
Deis will automatically provision worker nodes if you teach it your credentials.
We already have our Rackspace credentials saved to ~/paas/.chef/openrc but Deis wants them named differently:
$ export RACKSPACE_USERNAME=$OS_USERNAME
$ export RACKSPACE_API_KEY=$OS_PASSWORD
$ deis providers:discover
No EC2 credentials discovered.
Discovered Rackspace credentials: ****************
Import Rackspace credentials? (y/n) : y
Uploading Rackspace credentials... done
No DigitalOcean credentials discovered.
No Vagrant VMs discovered.
Deploy Formations & Layers
Formation
Formations are collections of infrastructure for serving applications. We’ll call our first Formation dev for development.
Create formation (using the wildcard domain from our cloud load balancer created earlier in the --domain argument):
$ deis formations:create dev --domain=50.56.167.26.xip.io
Creating formation... done, created dev
See `deis help layers:create` to begin building your formation
Layers
Layers are a heterogenerous collection of nodes that perform one of two function:
- Proxy - Directs traffic to the appropriate container running the application.
- Runtime - Runs the containers that hold the applications.
We’re going to create a layer called nodes that will perform both the proxy and runtime functions:
$ deis layers:create dev nodes rackspace-dfw --proxy=y --runtime=y
Creating nodes layer... done in 4s
note There’s currently a bug that causes the first creation of a layer to fail. if that happens run the following:
deis formations:create dev --domain=50.56.167.26.xip.io
Creating formation... done, created dev

See `deis help layers:create` to begin building your formation
$ deis layers:create dev nodes rackspace-dfw --proxy=y --runtime=y
Creating nodes layer... 500 INTERNAL SERVER ERROR
<h1>Server Error (500)</h1>
$ deis layers:destroy dev nodes
Destroying nodes layer... done in 0s
$ deis layers:create dev nodes rackspace-dfw --proxy=y --runtime=y
Creating nodes layer... done in 2s
Build Nodes
Next we tell deis to spin up two Cloud Servers which will become members of the nodes layer.
$ deis nodes:scale dev nodes=2
Scaling nodes... but first, coffee!
done in 345s
Use `deis create --formation=dev` to create an application
This can sometimes take longer than the deis cli timeout. Don’t fear, just wait a bit longer, this could be a great time to explore the deis cli by running deis help.
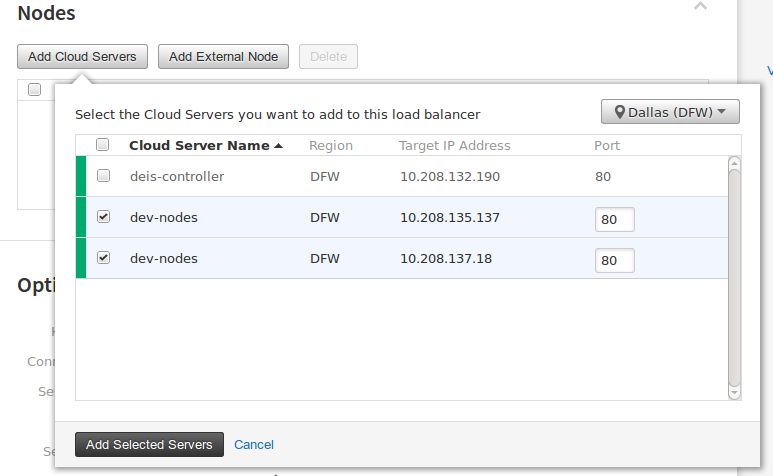
Update Cloud Load Balancer
Add these two nodes to the (https://mycloud.rackspace.com/load_balancers)[Cloud Load Balancer] we created earlier.
This is simple to do through the GUI:
- Click on your load balancer and under
Nodesclick theAdd Cloud Serversbutton. - Check the box beside the two
dev-nodesservers and clickAdd Selected Servers.
Deploy an Application
So great, you have a PaaS, but what do you do now? Deploy some apps of course!
NodeJS Example App
Download the NodeJS example application so like:
$ mkdir -p ~/paas/apps
$ cd ~paas/apps
$ git clone https://github.com/opdemand/example-nodejs-express.git
$ cd example-nodejs-express
Create an Application in Deis
Use the Deis command line tool to create a new application:
$ deis create
Creating application... done, created exotic-sandwich
Git remote deis added
Push your Application to Deis
This will push, deploy and Launch the app. The first one will take some time as deis has to download some docker images, subsequent apps will be much faster:
$ git push deis master
git push deis master
Counting objects: 184, done.
Delta compression using up to 4 threads.
Compressing objects: 100% (89/89), done.
Writing objects: 100% (184/184), 28.77 KiB | 0 bytes/s, done.
Total 184 (delta 103), reused 165 (delta 92)
-----> Node.js app detected
-----> Requested node range: 0.10.x
-----> Resolved node version: 0.10.26
-----> Downloading and installing node
-----> Installing dependencies
       npm WARN package.json example-nodejs-express@0.0.1 No repository field.
       npm http GET https://registry.npmjs.org/express
       npm http 200 https://registry.npmjs.org/express
...
-----> Caching node_modules directory for future builds
-----> Cleaning up node-gyp and npm artifacts
-----> Building runtime environment
-----> Discovering process types
       Procfile declares types -> web
-----> Compiled slug size is 5.5M
-----> Building Docker image
Uploading context 5.698 MB
Uploading context
Step 0 : FROM deis/slugrunner
 ---> bb0a27915014
Step 1 : RUN mkdir -p /app
 ---> Running in 1ae5cdeaad9a
 ---> 6e6467466d48
Step 2 : ADD slug.tgz /app
 ---> 191a4345b1e4
Step 3 : ENTRYPOINT ["/runner/init"]
 ---> Running in d322512d5865
 ---> 2866cf3e37c9
Successfully built 2866cf3e37c9
-----> Pushing image to private registry
       Launching... done, v2

-----> exotic-sandwich deployed to Deis
       http://exotic-sandwich.50.56.167.26.xip.io

       To learn more, use `deis help` or visit http://deis.io

To ssh://git@deis:2222/exotic-sandwich.git
 * [new branch]      master -> master
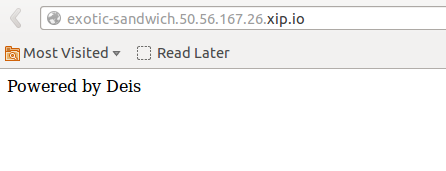
Did it work ?
Open your web browser to the URL in the output of the previous command. In my case this was http://exotic-sandwich.50.56.167.26.xip.io.
If everything worked the text in the browser window should read Powered by Deis.
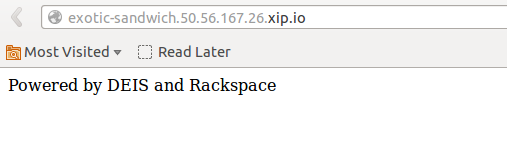
Configure and Scale your application
We can set config parameters for our apps by running deis config. The example app we’re using has a config paramater ‘POWERED_BY’ so we can set that by running:
$ deis config:set POWERED_BY='DEIS and Rackspace'
=== exotic-sandwich
POWERED_BY: DEIS and Rackspace
Expecting visitors? Let’s scale your app to 5 nodes:
$ deis scale web=5
Scaling containers... but first, coffee!
done in 54s

=== exotic-sandwich Containers

--- web: `node server.js`
web.1 up 2014-02-23T20:22:07.241Z (dev-nodes-2)
web.2 up 2014-02-23T20:28:21.778Z (dev-nodes-1)
web.3 up 2014-02-23T20:28:21.788Z (dev-nodes-2)
web.4 up 2014-02-23T20:28:21.799Z (dev-nodes-1)
web.5 up 2014-02-23T20:28:21.810Z (dev-nodes-2)
You can see what your app is doing by running deis info and deis logs:
$ deis info
=== exotic-sandwich Application
{
  "updated": "2014-02-23T20:28:21.812Z",
  "uuid": "ef618db6-f5a8-4cab-a7d9-d01e78036e3a",
  "created": "2014-02-23T20:16:51.931Z",
  "formation": "dev",
  "owner": "admin",
  "id": "exotic-sandwich",
  "containers": "{\"web\": 5}"
}

=== exotic-sandwich Containers

--- web: `node server.js`
web.1 up 2014-02-23T20:22:07.241Z (dev-nodes-2)
web.2 up 2014-02-23T20:28:21.778Z (dev-nodes-1)
web.3 up 2014-02-23T20:28:21.788Z (dev-nodes-2)
web.4 up 2014-02-23T20:28:21.799Z (dev-nodes-1)
web.5 up 2014-02-23T20:28:21.810Z (dev-nodes-2)
$ deis logs
Feb 23 20:22:57 dev-nodes exotic-sandwich[web.1]: Server listening on port 10001 in development mode
Feb 23 20:25:38 dev-nodes exotic-sandwich[web.1]: Server listening on port 10001 in development mode
Feb 23 20:26:49 dev-nodes exotic-sandwich[web.1]: Server listening on port 10001 in development mode
Feb 23 20:28:28 dev-nodes exotic-sandwich[web.3]: Server listening on port 10003 in development mode
Feb 23 20:28:29 dev-nodes exotic-sandwich[web.5]: Server listening on port 10005 in development mode
Feb 23 20:29:11 dev-nodes exotic-sandwich[web.2]: Server listening on port 10002 in development mode
Feb 23 20:29:12 dev-nodes exotic-sandwich[web.4]: Server listening on port 10004 in development mode
Congratulations! You’ve successfully built out your own cost effective PAAS and deployed your first application to it.
Speaking of costs … How much would this cost to run per month ?
- Cloud Load Balancer - $10.95 / month
- Deis Controller - $57.60 / month
- Deis Nodes (x2) - $115.20 / month
Total: $183.75 / month.
You could run all of this on a single server without a load balancer, which means it would be just $57.60/month, which with the Rackspace Developer Discount would reduce down to just $7.60/month.
Epilogue
Cleanup
Destroy your app:
$ deis destroy

 !    WARNING: Potentially Destructive Action
 !    This command will destroy the application: exotic-sandwich
 !    To proceed, type "exotic-sandwich" or re-run this command with --confirm=exotic-sandwich

> exotic-sandwich
Destroying exotic-sandwich... done in 21s
Git remote deis removed
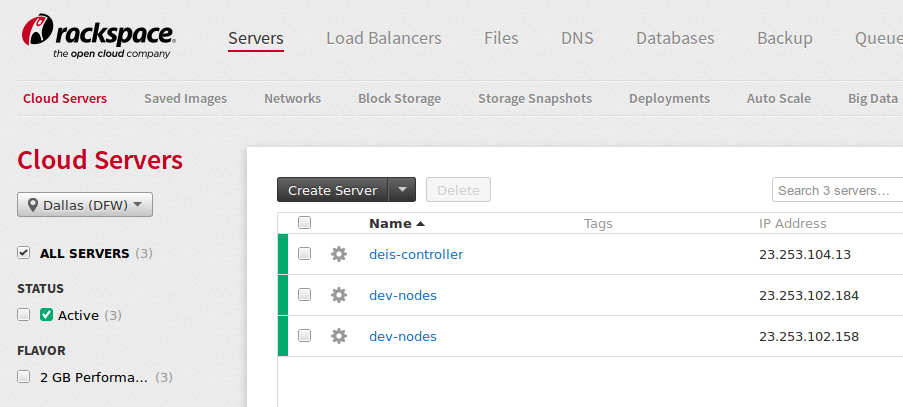
list your servers:
$ bundle exec knife rackspace server list
Instance ID                           Name             Public IP       Private IP      Flavor          Image                                 State
7c43ecb9-1ba3-454c-a5f4-637b56961d68  dev-nodes        23.253.102.184  10.208.135.137  performance1-2  2d59cbce-92fa-412b-8a5e-6eb426ce7dc9  active
f89c4b25-6486-422a-907a-16b3b3223a5e  dev-nodes        23.253.102.158  10.208.137.18   performance1-2  2d59cbce-92fa-412b-8a5e-6eb426ce7dc9  active
bb713170-9322-424a-8837-863a4b396705  deis-controller  23.253.104.13   10.208.132.190  performance1-2  a58c9895-6349-442a-bba7-99611900209d  active
Delete your servers by running the following command for each:
$ bundle exec knife rackspace server delete 7c43ecb9-1ba3-454c-a5f4-637b56961d68 --purge
Instance ID: 7c43ecb9-1ba3-454c-a5f4-637b56961d68
Host ID: e0da0172f321babe99aec9686c7b99ac7fa5ff8fa1ada934f5fae842
Name: dev-nodes
Flavor: 2 GB Performance
Image: deis-node-image
Public IP Address: 23.253.102.184
Private IP Address: 10.208.135.137

Do you really want to delete this server? (Y/N) y
[WARNING] Error Parsing response json - Yajl::ParseError
WARNING: Deleted server 7c43ecb9-1ba3-454c-a5f4-637b56961d68
Clean up your chef:
$ bundle exec knife data bag delete deis-apps
$ bundle exec knife data bag delete deis-formations
$ bundle exec knife client delete dev-nodes-1
$ bundle exec knife client delete dev-nodes-2
$ bundle exec knife node delete dev-nodes-1
$ bundle exec knife node delete dev-nodes-2
Delete your glance images:
$ nova image-delete deis-base-image
$ nova image-delete deis-node-image
Finally delete your Cloud Load Balancer from the Rackspace UI