I’m migrating from my old VMWare ESXi box to a new machine running Ubuntu 12.10 and KVM. Not wanting to rebuild all of my VMs I set about trying to work out the best way to migrate the VMs.
Steps to make Windows migrate without Bluescreen
If you migrate a windows box it’ll bluescreen due to the shock of so much hardware changing. The following .reg hack will prevent this from happening by opening up access to a bunch of random system drivers. Copy and run the .reg file in your VM before doing any further steps.
Move your VM to shared storage
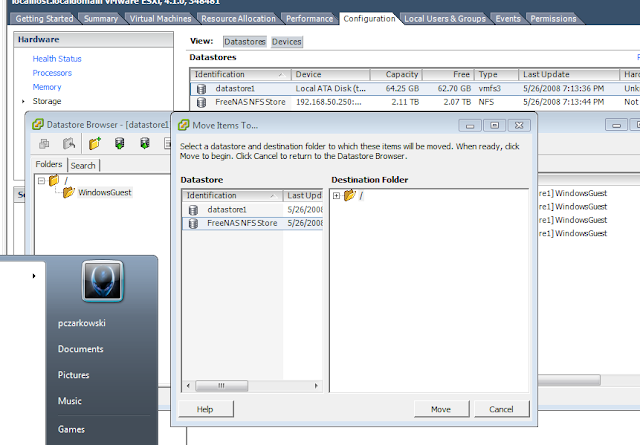
I mounted an nfs partition to vmware from my freenas box and migrated the data across using the vmware datastore tools. If you don’t have a NAS you could export a directory from your KVM server to achieve the same goal.
To move VMs in ESXi we click on the ESXi server, pick the Configuration tab, click on ‘Storage’ and then right-click on the datastore and select ‘Browse Datastore’. Select the VM folder you wish to move and click the move icon.
Convert your VM to qcow2 format
Next we need to make your VM available to the KVM server. Again I just mounted my nfs volume to it. You could run the VM from NFS if you want, but I want to run it locally.
kvm-img convert -O qcow2 /mnt/freenas/vms/WindowsGuest/WindowsGuest.vmdk \
  /data-disk/VMs/WindowsGuest.qcow2
`
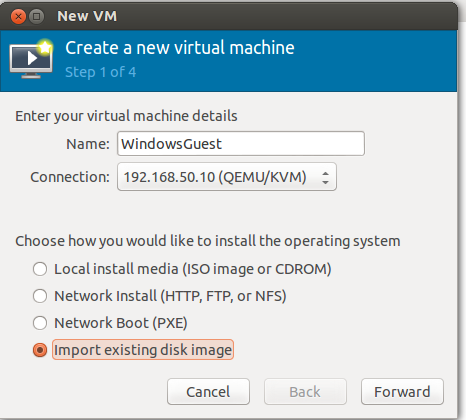
It’ll take a while to convert. Once it’s done you can make it available to KVM. I used the VirtualMachineManager GUI, but you could use virsh if you want. Simply create a new VM like you would usually except check the ‘Import existing disk image’ option.
{% img https://lh6.googleusercontent.com/-dXfvXbUOE5c/UMUkwnky73I/AAAAAAAAAHg/DDjgO2CAwqI/s800/vmware-2.png %}
Then choose your VM image and set the OS versions.
{% img https://lh3.googleusercontent.com/-OybiOO1KsGI/UMUk9JbhzpI/AAAAAAAAAHo/zayosuFa5co/s800/vmware-3.png %}
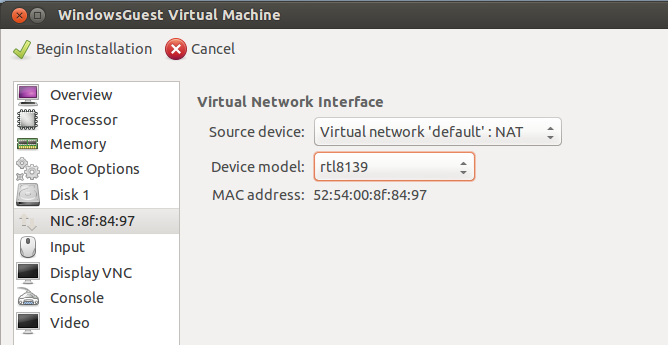
If Windows then choose ‘edit VM before starting it and select the realtek network adaptor.
{% img https://lh4.googleusercontent.com/-MHBkRrhkCI4/UMUlQJ_6ZcI/AAAAAAAAAHw/-Dj9UYNszgU/s800/VMWare-4.png %}
Once created the VM should start up fine. If the VM is running Windows you’ll probably need to re-activate it as the hardware change will make it think you’ve pirated it.
{% img https://lh5.googleusercontent.com/-iJuM6CXhWVo/UMUlnT4qjHI/AAAAAAAAAH4/mahRyoBn4ZM/s800/vmware-5.png %}